Here’s the good news: egg retrieval is a fairly quick procedure. And here’s the better news: you’ll be asleep throughout the entire thing.
After weeks of injections, monitoring appointments, and watching those follicles grow on ultrasound, this is the moment where it all comes together. It’s strange – you’ve worked so hard to get here, and then suddenly you’re asleep for the main event.
Before your egg retrieval: what to expect
You’ll arrive at the clinic at your scheduled time. Most clinics ask you to arrive 30 to 60 minutes before your retrieval is scheduled.
The fasting rule: You won’t be able to eat or drink anything for at least six hours before your procedure. This is standard protocol for any procedure involving anaesthesia, so your stomach needs to be completely empty. Yes, even water. I know, it’s torture when you’re already anxious.
What to wear and bring: Wear comfortable, loose clothing. You’ll change into a hospital gown, so skip anything complicated. I always took a handbag big enough to pack my clothes into. The nurses will put it somewhere safe for you.
The partner requirement: You’ll need someone to drive you home. The anaesthesia means you legally cannot drive for 24 hours, and honestly, you won’t want to. Arrange this ahead of time, whether it’s your partner, a friend, or family member.
Once you arrive, you’ll be taken to the day theatre. You’ll change into a gown, and a nurse will go through your medical history and check your vitals. The anaesthetist will also see you just before to explain what will happen.
During your egg retrieval: step by step
Once the surgical team is ready for you, you’ll walk into the operating theatre. Try to keep calm – and I know that’s easier said than done. But genuinely, this is the easiest part of the entire IVF journey. You won’t feel a thing.
Here’s exactly what happens:
Anaesthesia: The anaesthetist will administer medication through your IV line. Some clinics use general anaesthesia (you’re completely unconscious), while others use conscious sedation (you’re deeply asleep but breathing on your own). Either way, within seconds, you’ll be fighting to keep your eyes open. And then… nothing.
The retrieval procedure: While you’re asleep, your doctor will use transvaginal ultrasound to guide a long, thin needle through your vaginal wall and into each ovarian follicle. The needle aspirates (sucks out) the follicular fluid, which contains the egg. Each follicle is drained one by one.
The embryologist’s role: The fluid from each follicle is immediately passed to the embryologist, who examines it under a microscope to locate the eggs. This happens in real-time while you’re still under anaesthesia.
The reality check: Not every follicle contains an egg. And not every egg collected will be mature. This is completely normal, but it can be disappointing when your final egg count is lower than the number of follicles you had on your last scan.
The entire procedure typically takes 20 to 30 minutes, though it can be longer if you have many follicles or shorter if you have fewer. Your doctor will carefully check that all accessible follicles have been aspirated before finishing.
After your egg retrieval: waking up in recovery
Once your doctor and embryologist are confident that all eggs have been collected, you’ll be taken to the recovery area. You’ll gradually wake up – some people feel alert quickly, others take longer to shake off the grogginess.
You can keep napping if you need to. There’s no rush. A nurse will monitor you until you’re fully awake and your vital signs are stable. You’ll be offered something to eat and drink before being discharged. Take your time. Eat slowly. Your body has just been through something significant.
For example, if 15 follicles are seen, doctors might estimate around eight to 10 mature eggs, but factors like age, ovarian reserve, and response to medication greatly influence the actual number and outcome.
Getting your initial results: Before you leave, you’ll meet briefly with your doctor. They’ll tell you how many eggs were retrieved. At this stage, they only know the total number collected – not how many are mature or how many will fertilise successfully. Those answers come tomorrow.
Understanding egg numbers (to manage your expectations)
This is where things get emotionally complicated, so let’s be really clear about the numbers.
If your last ultrasound showed 15 follicles, it’s realistic to expect around 10-12 eggs retrieved, with perhaps 8-10 of those being mature. But factors like your age, ovarian reserve, how you responded to medication, and even the skill of your surgical team all influence the actual outcome.
Some follicles are empty. Some eggs aren’t mature enough for fertilisation. This is heartbreaking when it happens, but it’s a normal part of the biology. Your clinic should have prepared you for this reality, but the disappointment still hits hard when your number is lower than you hoped.
Recovery after your egg retrieval
Recovery is generally straightforward, but you will feel it.
What to expect physically:
Cramping and pelvic discomfort, similar to period pain (sometimes worse)
Light spotting or bleeding from where the needle passed through the vaginal wall
Bloating and abdominal tenderness
Fatigue from the anaesthesia
Potential nausea as the drugs wear off
Pain management: Take the pain medication your clinic prescribes or recommends. Don’t try to tough it out.
What to do for the rest of the day: Netflix and chill. Yes, really! Rest on the couch, nap, stay hydrated, eat gentle foods. Your partner, friend, or family member should be on hand to look after you. You’re 100% allowed – and encouraged – to take it easy.
When to call your clinic:
Severe abdominal pain that gets worse, not better
Heavy bleeding (soaking through a pad in an hour)
Fever over 38°C
Difficulty breathing or chest pain
Severe nausea or vomiting
These symptoms could indicate ovarian hyperstimulation syndrome (OHSS) or infection, both of which need immediate medical attention.
What happens to your eggs next
After your eggs are retrieved, they’re taken straight to the lab and carefully cleaned of surrounding cells and fluid. Now comes the fertilisation stage.
Traditional IVF (conventional insemination): The eggs and sperm are placed together in a culture dish and left to do their thing overnight. The sperm need to penetrate the egg naturally. This method works well when sperm quality and count are normal.
ICSI (intracytoplasmic sperm njection): A single sperm is selected and injected directly into each mature egg using a tiny needle. ICSI is often recommended if there are concerns about sperm quality, low sperm count, previous fertilisation failures, or if you’re using frozen sperm.
Many clinics now use ICSI as standard practice, even when sperm parameters are normal, because it can improve fertilisation rates and provide more control over the process.
Next steps
The next morning, you’ll get your first lab update. This is when you’ll find out:
How many of your retrieved eggs were actually mature
How many fertilised successfully
A fertilised egg is now called an embryo. From here, it will go through several stages of development over the next five to six days:
Day 1: Fertilisation confirmed (you’ll see two pronuclei)
Day 2-3: The embryo divides into multiple cells (2-cell, 4-cell, 8-cell)
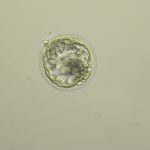
Day 5-6: The embryo reaches the blastocyst stage – this is when embryos are typically transferred or frozen
Not all embryos make it to blastocyst. Some stop developing along the way. This is another brutal reality of IVF – you can start with a promising number and watch it drop day by day.
Your clinic will update you regularly (usually every other day) to let you know how your embryos are progressing. These updates can be emotionally challenging. Every update brings hope and fear in equal measure.
Freezing your embryos
If you’re not doing a fresh transfer (which is increasingly common), or if you have extra embryos after your transfer, they can be frozen using a technique called vitrification – a rapid-freeze method that prevents ice crystal formation.
The freezing and thawing technology has improved dramatically over the years. Embryos can be stored indefinitely without compromising their quality. Frozen embryo transfers (FETs) actually have slightly higher success rates than fresh transfers in many cases, because your body isn’t dealing with the hormonal aftermath of stimulation.
Your embryos will stay frozen in liquid nitrogen at -196°C until you’re ready to use them. You’ll pay an annual storage fee, and you can keep them stored for as long as you need, whether that’s months, years, or decades. Make sure you’re aware of what the annual fee is – your clinic should include it in your IVF quote.
The emotional aftermath
Let’s talk about what nobody really warns you about: the emotional crash after retrieval.
You’ve spent weeks building up to this moment. Your body has been pumped full of hormones. You’ve been laser-focused on growing those follicles, getting to trigger day, and making it to retrieval. And then suddenly… It’s done. You’re lying on your couch, cramping, waiting for tomorrow’s phone call, and the anxiety is crushing.
This is normal. The hormone drop alone is enough to mess with your emotions. Add in the fear of how many eggs will be mature, how many will fertilise, whether any will make it to blastocyst – it’s overwhelming.
Be gentle with yourself. Let yourself cry if you need to. Lean on your support system. And try – as impossible as it sounds – to rest and let your body recover.
Disclaimer: The information shared on What the Fertility is for general awareness only and should not replace medical advice. Always consult a qualified healthcare professional for guidance on your personal situation.





No Comment! Be the first one.